Project Management Process Step by Step (2026 Guide) | The Collaborative Organization
By The Collaborative Organization Team · November 19, 2026 · Last verified November 19, 2026 · 14 min read
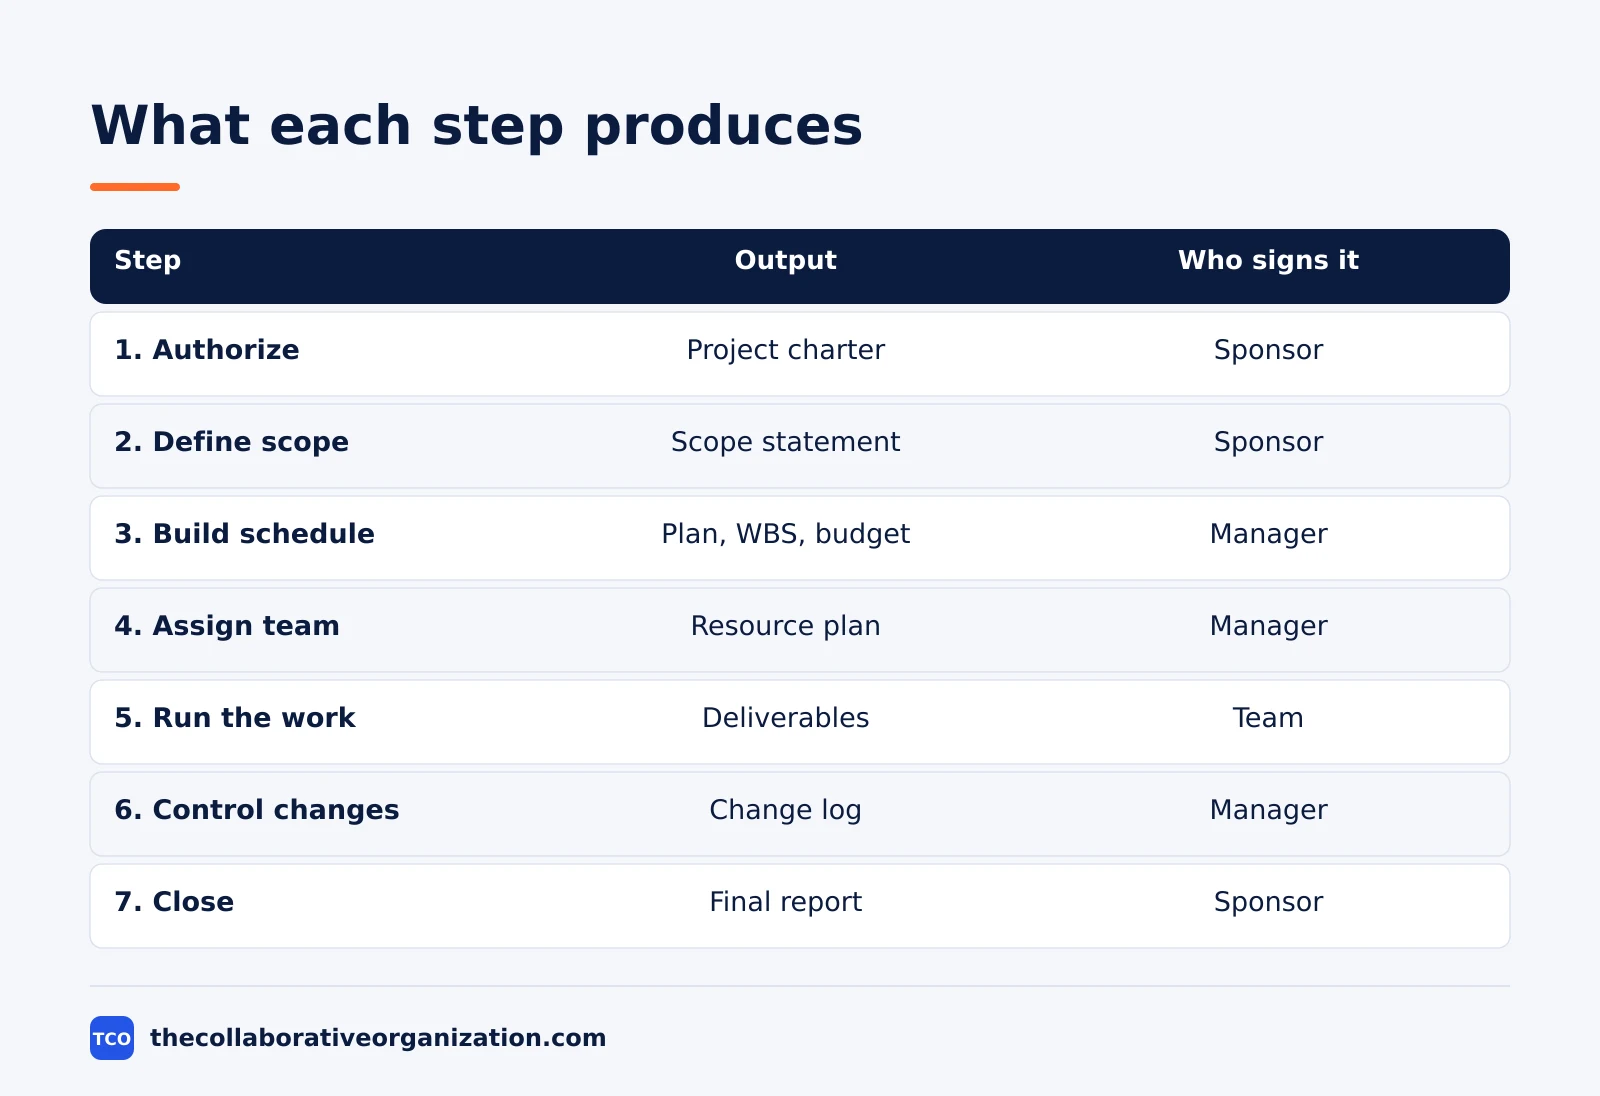
The project management process runs in seven steps: authorize the project, define the scope, build the schedule and budget, assign the team, run the work, control changes, then close and record lessons learned. Each step produces one document or decision the next step needs.
Skip a step and the missing piece shows up later, usually as a delay or a surprise cost.
Key takeaways
- The process has seven steps, from the charter that authorizes the work to the final report that records what the team learned.
- The five PMI process groups sit behind the steps: Initiating, Planning, Executing, Monitoring and Controlling, and Closing.
- Process groups are kinds of work that overlap, not fixed phases, and monitoring runs through the whole project.
- The planning steps take the most time, because a clear scope, schedule and budget save far more time during delivery.
- Every step ends with one output, such as a charter, a work breakdown structure or a change log, that the next step needs.
- A project that finishes on time but delivers the wrong result failed the process, even if the schedule looked clean.
What the project management process is
The project management process is the ordered set of steps a manager follows to take a project from an idea to a finished, handed-over result. It turns a request into authorized work, then into a plan, then into deliverables, then into a closed project with lessons recorded. The steps are the same for a website launch and a factory move, though the documents get longer as the project grows.
The process rests on the five PMI process groups: Initiating, Planning, Executing, Monitoring and Controlling, and Closing. Teamwork lists the same five groups and notes that planning is the largest of them, covering scope, budgets, schedules, communications and risk responses. The groups describe kinds of work, not a calendar.
That distinction matters. Process groups are not project phases, and they overlap through the whole project. Monitoring and Controlling starts in the first week and ends at the close, running beside the other groups the entire time. A manager who waits until the end to check progress has no process at all, only a hope.
What you need before you start
Before the first step, you need a sponsor, a named project manager and a one-paragraph statement of the result. The sponsor is the person who approves the work and owns the budget. The manager is the person who runs the process day to day. The result statement says what will exist when the project is done, in words anyone on the team can repeat.
You also need a way to hold the plan. A shared tool beats a spreadsheet once more than two people touch the work, because the tool shows owners, dates and status in one place.
Our guide on how to choose project management software covers seat counts and free-plan caps. Pick the tool before the planning step, so the plan is built where the team will work.
Time is the last input. A small project needs a few hours of planning spread over a week. A large project needs days of planning with the team in the room. Do not start the work until the sponsor has signed the charter, or the team will build on an approval that never came.
The 7 steps at a glance
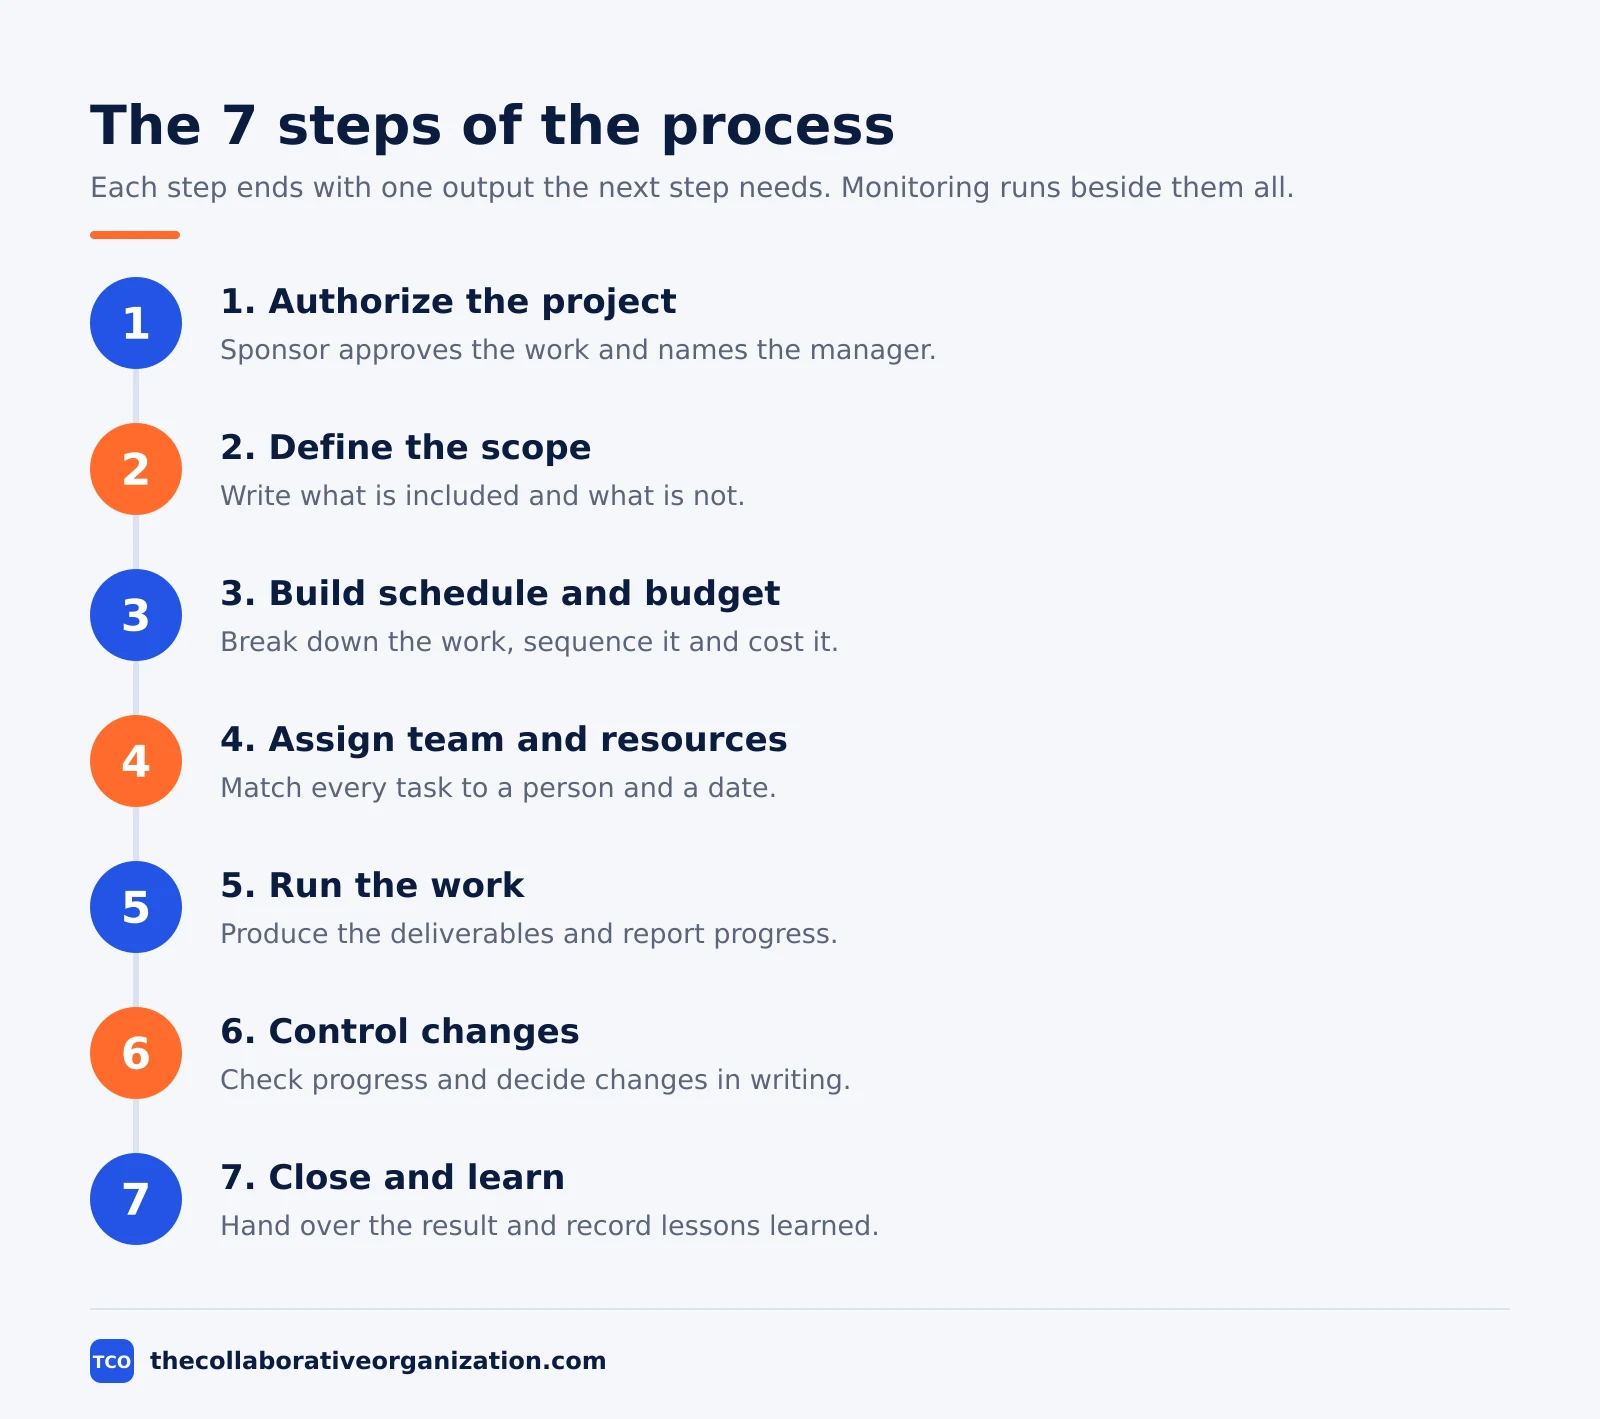
The seven steps move from approval to delivery to close, with monitoring running beside them all the way. Each step ends with one output that the next step needs, so the process has no gaps and no repeated work.
| Step | What happens | Output |
|---|---|---|
| 1. Authorize | Sponsor approves the project and names the manager | Project charter |
| 2. Define scope | Team writes what is included and what is not | Scope statement |
| 3. Build schedule and budget | Work is broken down, sequenced and costed | Plan, WBS, schedule, budget |
| 4. Assign team and resources | People, tools and materials are matched to tasks | Resource plan |
| 5. Run the work | Team produces the deliverables | Deliverables, status reports |
| 6. Control changes | Progress is checked and changes are decided | Change log, updated plan |
| 7. Close and learn | Result is handed over and lessons are recorded | Final report, lessons learned |
The table above is the map for the rest of this guide. Each section below takes one step, says what good looks like and names the output to file before moving on.
Step 1: Authorize the project
Step 1 authorizes the project with a charter, so the team has written permission to spend time and money. The sponsor writes or approves the charter, names the project manager and states the goal, the high-level scope and the budget limit. The charter is short, often one or two pages, because detail belongs in the plan, not in the approval.
The charter also names the key stakeholders: the people who can approve, block or use the result. List them now, with what each one needs from the project. A stakeholder found in week six is a surprise, and surprises at that stage cost days.
Our guide on project charter vs project plan explains the split: the charter authorizes the work, while the plan says how the work gets done. Do not write a plan before the charter is signed, or you may plan work the sponsor never approved.
Outcome of step 1
A signed charter with a named sponsor, a named manager, a goal and a budget limit. If the sponsor will not sign, the project is not ready, and the right move is to fix the goal, not to start the work anyway.
Step 2: Define the scope
Step 2 writes down exactly what the project will and will not deliver, in a scope statement the sponsor signs. Start from the charter goal and list the deliverables, then list the exclusions: the work people might assume is included but is not. Add the assumptions you are making and the limits you must respect, such as a fixed launch date or a set budget.
A scope statement is the document that stops scope creep, which is work added without a matching change to time or budget. When someone asks for one more feature, the scope statement lets you answer with a trade.
Add the feature and move the date, or keep the date and drop something else. Without it, the extra work just appears, and the deadline slips quietly.
Our guide on how to write a project brief covers the same ground for a shorter document, and the brief can feed straight into the scope statement. Keep the statement to one page if you can, so the team reads it.
Outcome of step 2
A signed scope statement with deliverables, exclusions, assumptions and limits. If two stakeholders describe the result differently after reading it, rewrite it until they describe the same thing.
Step 3: Build the schedule and budget
Step 3 turns the scope into a work breakdown structure, a schedule and a budget. Break each deliverable into work packages, which are chunks of work with one owner that you can estimate and assign. The WBS is organized around deliverables, not activities, and the 100% rule applies: it must cover all of the work in scope and nothing extra.
Sequence the packages, estimate how long each takes, and find the critical path: the chain of tasks that sets the earliest finish date. Then cost each package and add the totals into a budget baseline. The baseline is the snapshot you measure against later, so save it before the work starts and do not move it without a recorded change.
ClickUp notes the same shape in its plan guide: a 3-week internal project needs a 2-page plan, while a 6-month cross-team effort needs a 15 to 20 page plan, with the structure the same either way. The size of the document changes, not the steps.
Outcome of step 3
A baseline plan with a WBS, a dated schedule, named milestones and a budget. If a task has no owner or no date, it is not planned yet, and it will be the task that slips.
Step 4: Assign the team and resources
Step 4 matches every work package to a person, a tool or a material, and checks that no one is booked twice. Go through the schedule task by task and name the owner, the hours needed and the date the work happens. Check each person’s other commitments, because a plan that gives one person two full-time jobs in the same week is fiction.
This is also the step to confirm outside help: suppliers, contractors and approvals from other teams. Book them now, with dates, so a missing approval does not stall the work later. A supplier told in week one can plan around you, while a supplier told in week five may have no capacity left.
Hold a kickoff meeting at the end of this step, so the whole team hears the goal, the dates and their own tasks from the manager, not second-hand. Our guide on how to run a team kickoff covers the agenda for that meeting.
Outcome of step 4
A resource plan with a named owner for every task, confirmed dates for outside help and a kickoff date. If the same person owns three tasks on the same day, rebalance before the work starts.
Step 5: Run the work
Step 5 is the work itself: the team produces the deliverables, and the manager keeps the work moving. The manager runs short check-ins, clears blockers and updates the plan when a task moves. The team reports progress in the tool, so the manager sees status without chasing people for updates.
Keep the rhythm simple. A weekly check asks four questions: what is done, what is late, what is blocked and what changed. A daily check is only needed when the work is fast and tightly linked, such as a launch week. Long status meetings that repeat the same news waste the time the team needs to do the work.
Problems found in this step are normal. A task runs long, a supplier slips, a requirement turns out to be unclear. The manager records each one, decides the fix and tells the sponsor when the fix changes the date, the budget or the scope.
Outcome of step 5
Deliverables produced to the quality the plan promised, with status reports that show real progress, not only activity. If the reports say everything is on track while the work is late, the reporting is broken, not the team.
Step 6: Control changes
Step 6 checks progress against the baseline and decides every change through one written process. Compare the real dates and spend with the plan each week, and flag any gap early. A gap found in week three costs a conversation to fix, while the same gap found in week nine costs a replan.
Every change request goes through the same four moves: request, review, approve, log. The review asks what the change costs in time, money and scope, and who pays that cost. The log records the decision, so the team does not argue it again and the sponsor can see how the plan moved.
Change control is not red tape. It is the only way the baseline stays honest. A plan that changes without a record is not a plan, and a sponsor who learns of a delay from a hallway chat has lost trust in the process.
Outcome of step 6
An updated plan, a change log and status reports that match reality. If the baseline and the real work have drifted apart with no record, stop and reconcile them before the next week starts.
Step 7: Close the project and record lessons
Step 7 closes the project formally: the sponsor accepts the result, the team is released and the lessons are written down. Get written sign-off that the deliverables meet the scope, then hand the result to the people who will run it. Close the contracts, file the final documents and release the team to their next work.
Then run a short lessons review with the team. Ask three questions: what worked, what went wrong and what should change next time. Write the answers in one page and file them where the next project manager will find them. A lesson written down is an asset, while a lesson only talked about is lost within a month.
The final report is the last output of the process. It records the goal, the result, the final dates and costs, and the lessons. Future projects start from that page, not from zero.
Outcome of step 7
A signed handover, a closed budget and a final report with lessons learned. If the sponsor has not signed, the project is not closed, even if the team has moved on.
Worked example: a 10-week onboarding project
A 10-week project to onboard a new hire group shows all seven steps in one place. Imagine a team of four people building an onboarding program for 20 new hires, with a budget of $15,000 and a start date fixed by the hiring round. The result is one onboarding program: four training sessions, a handbook and a buddy system.
Step 1 takes one week: the sponsor signs a charter naming the HR lead as manager and the $15,000 budget. Step 2 takes three days: the scope lists the four sessions and the handbook, and excludes manager training, which the sponsor wants next year.
Step 3 takes one week: the WBS breaks the handbook into eight chapters, the schedule sets a milestone each fortnight, and the budget splits the $15,000 across trainers, materials and the venue.
Step 4 assigns the work: two trainers own the sessions, one writer owns the handbook, and the manager owns the buddy system. Step 5 runs for six weeks, with a weekly check that catches a late chapter in week four.
Step 6 records the fix: the writer gets help for three days, the budget moves by $800, and the date holds. Step 7 closes with a sign-off from the sponsor and a lessons page that says to start the handbook two weeks earlier next time.
How to measure success
Measure the process by three numbers: scope delivered, variance from the baseline and lessons recorded. Scope delivered is the share of the written deliverables the sponsor accepted. Variance is the gap between the planned dates and costs and the real ones, and small gaps mean the plan was honest. Lessons recorded is the simplest check of all: a closed project with no lessons page taught the next project nothing.
Add two softer checks. Ask the team whether the plan helped or got in the way, and ask the sponsor whether the status reports told the truth. A process that produces good numbers but burns out the team will not survive the next project, so both answers matter.
If all three numbers are good and both answers are yes, the process worked. If the numbers are good but the team says the plan was fiction, fix the planning steps before the next project starts.
Tools that hold the process
A project tool holds the seven steps in one place, so the plan, the tasks and the change log stay together. The tool carries the schedule, the owners and the status, which means the manager updates one place instead of three documents. Our shortlist on the project management software page compares the options.
| Tool | Best for | Free plan | Starting price (as of November 2026) | Notable limit |
|---|---|---|---|---|
| Asana | Teams that want every step to have a named owner | Free for 2 people | $10.99 per user per month (Starter), billed annually | Free plan covers 2 people |
| ClickUp | Teams that want the WBS, Gantt chart and docs in one tool | Free Forever plan | $9 per user per month (Core), billed annually | Page shows $9 against a $12 regular price, so it may be promotional |
| Trello | Small teams that want a simple board per step | Free for up to 10 collaborators | $5 per user per month (Standard), billed annually | $6 per user per month if billed monthly |
The Asana price comes from Asana pricing: the Personal plan is free for 2 users, and Starter is $10.99 per user per month when billed annually.
The ClickUp pricing page lists Core at $9 per user per month billed yearly, shown against a $12 regular price.
The Trello pricing page lists Standard at $5 per user per month billed annually, or $6 billed monthly.
Common project management process mistakes to avoid
Most process failures come from skipping a step, not from doing a step badly. Check this list before you start the work.
- Planning without a charter. A team that starts before the sponsor signs is building on an approval that may never come.
- Scope written as a wish list. A scope with no exclusions grows every week, and the date slips with it.
- No baseline saved. A plan that changes without a saved baseline cannot be measured, so no one knows if the project is late.
- Monitoring left to the end. Progress checked only at the end is a post-mortem, not control, and the fixes come too late.
- Closing without a sign-off. A project that never gets formal acceptance drifts on, with small requests arriving for months.
Sources
- PMI - What Is Project Management (2026)
- Teamwork - The 5 Project Management Process Groups (2026)
- Institute of Project Management - PM Process Groups Explained (2026)
- LibreTexts - Process Groups and Knowledge Areas (2026)
- ClickUp - How to Create a Project Plan (2026)
- Asana - Pricing (2026)
- ClickUp - Pricing (2026)
- Trello - Pricing (2026)
Frequently asked questions
What are the steps of the project management process?
The process runs in seven steps: authorize the project, define the scope, build the schedule and budget, assign the team and resources, run the work, control changes, then close and record lessons learned. The five PMI process groups sit behind these steps, and the monitoring work runs through the whole project, not only at the end.
How long does the project management process take?
It depends on the size of the project. A small internal project can move through all seven steps in two to three weeks, while a large cross-team project can take months of planning before the work starts. The planning steps usually take the most time, because a clear scope and schedule save far more time later.
What is the difference between process groups and project phases?
Process groups are kinds of work, such as planning or monitoring, that run through the whole project and overlap each other. Phases are time periods, such as initiation or execution, that follow one after another. Monitoring and controlling, for example, is a process group that runs from the first week to the last, not a phase at the end.
What document starts the project management process?
The project charter starts it. The charter is a short document from the sponsor that authorizes the project, names the project manager and states the goal and the high-level scope. No detailed planning should start before the charter is approved, because the team needs that authority to spend time and money.
How do you know the process worked?
Check three things at the end: the result matches the written scope, the finish date and budget are close to the plan, and the team recorded what to repeat and what to change. A project that finishes on time but delivers the wrong result failed the process, even if the schedule looked clean.
Related articles
project management
How to Choose Project Management Software (2026)
Pick project management software in seven steps: define the work, count seats, price the real cost, and run a two-week pilot before you pay.
November 19, 2026 · 10 min read
project management
What Is a RACI Matrix? Definition, Roles and Examples (2026)
A RACI matrix maps who is Responsible, Accountable, Consulted and Informed for each task. Learn the four roles, how to build one, and see a worked example.
November 19, 2026 · 9 min read
project management
Daily Standup Meeting Format That Works (2026)
A daily standup is a 15-minute meeting where Developers inspect progress toward the Sprint Goal and plan the next day. Use this format to run one that ends on time.
November 19, 2026 · 10 min read